

WINDOWS SOFTWARE / PUBLIC BETA 5
Brassworks
Connect.
Fly the same Q400 with a friend. One pilot flies while the other works the radios, sets the heading or enters the route.
Neither pilot needs a BRASS WORKS panel. Use your usual simulator controls. If you own a panel, Connect also links it to your simulator, lets you check its inputs and manages firmware updates.
Version 0.3.0 · Windows 10 (1903+) / 11 x64 · 47.4 MB
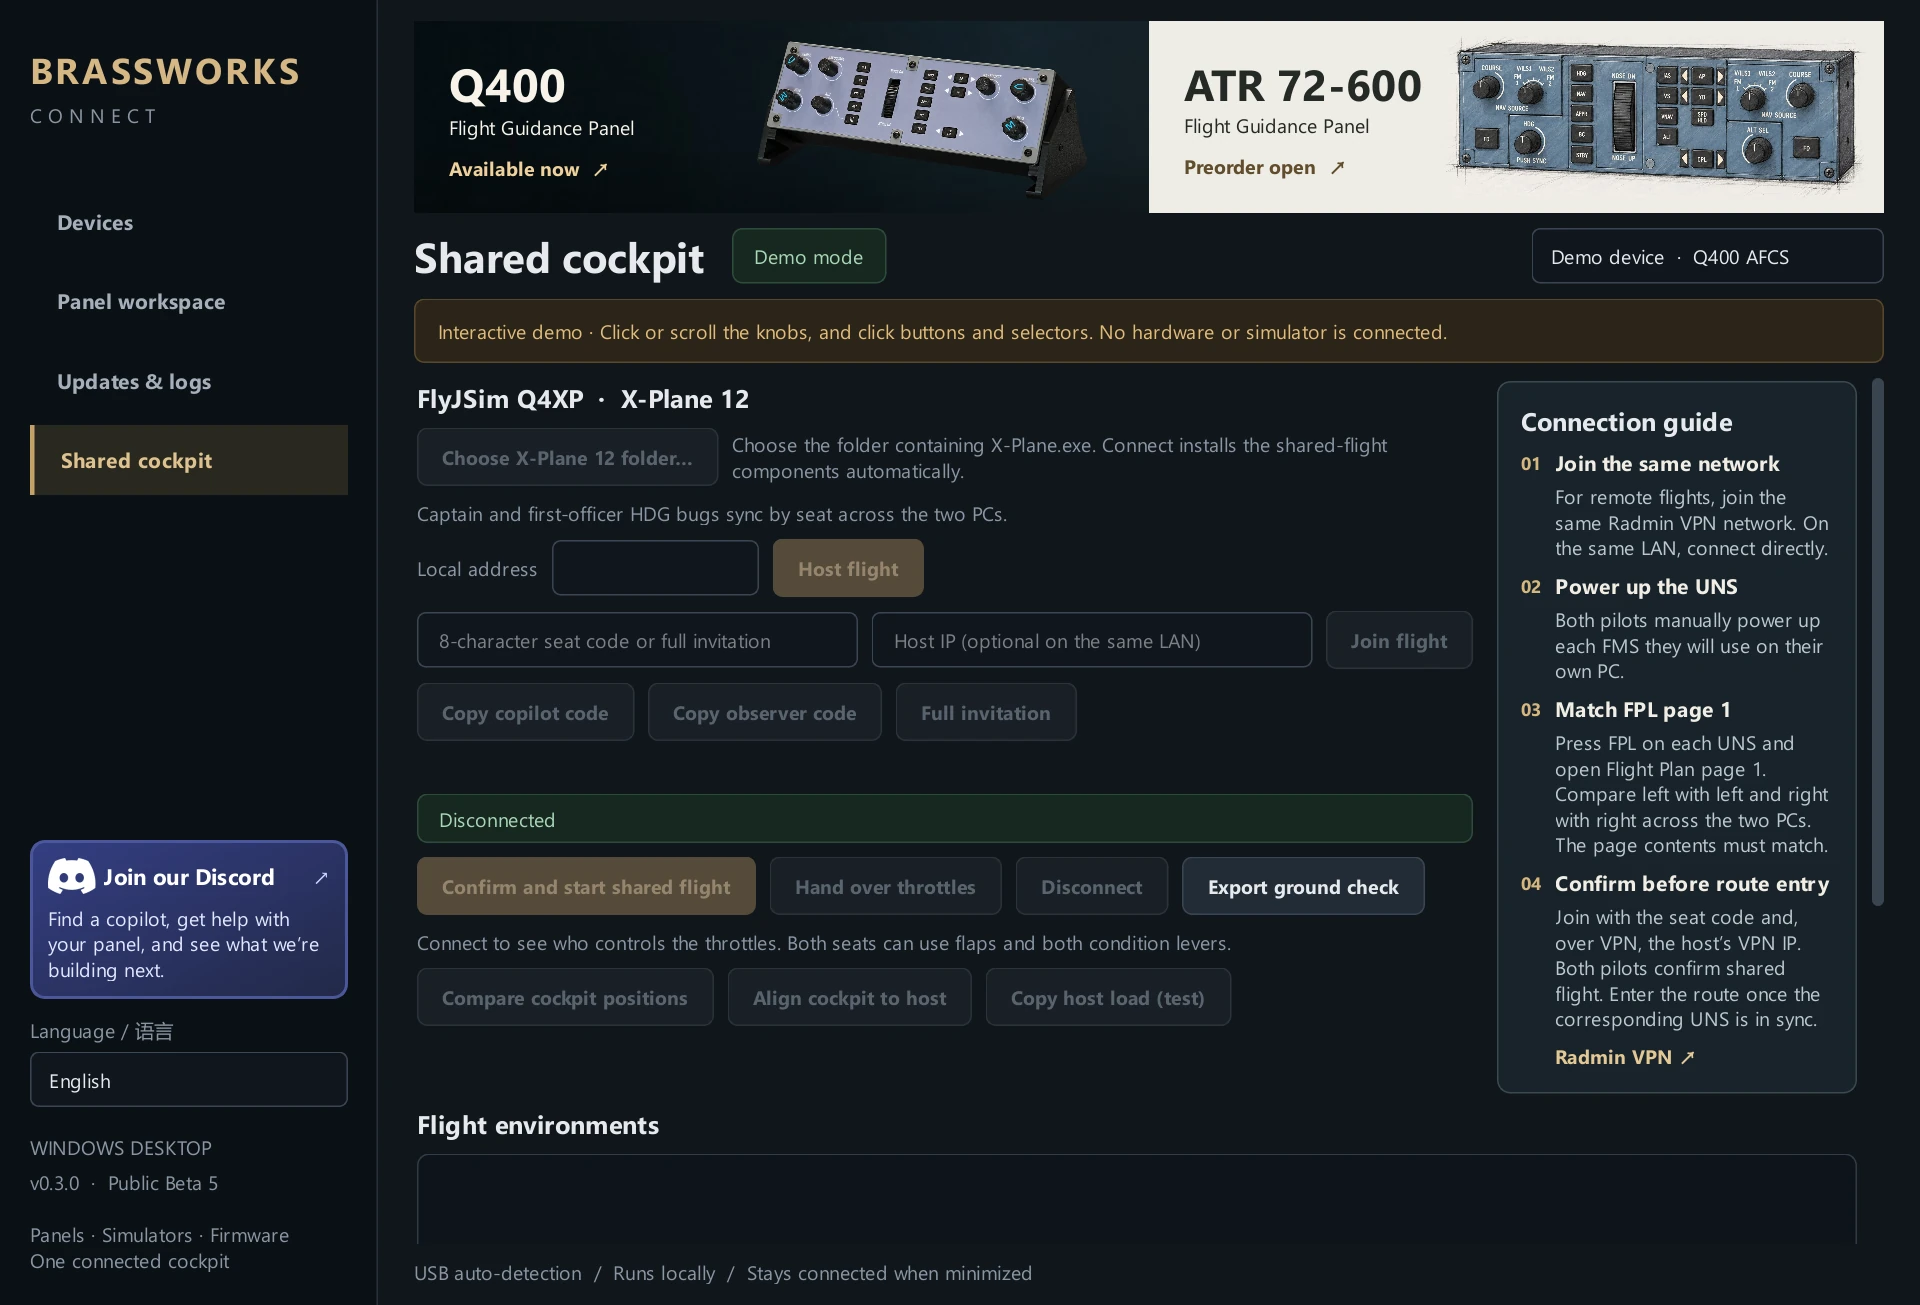
FlyJSim Q4XP in X-Plane 12
ATR shared cockpit
Your first shared flight
Both pilots need a Windows PC, X-Plane 12, the FlyJSim Q4XP and the same Connect beta.
1. Put both PCs on the same network
Compare the exact X-Plane 12 version and build, the FlyJSim Q4XP aircraft version, and the BRASSWORKS CONNECT beta on both PCs. If one differs, bring both PCs to the same version before hosting or joining.
Flying from different homes? Use a VPN that lets the two PCs reach each other by their virtual IPv4 addresses. We recommend Radmin VPN because we tested with it. Another VPN with the same peer-to-peer connectivity can also be used.
- Both pilots install and open Radmin VPN.
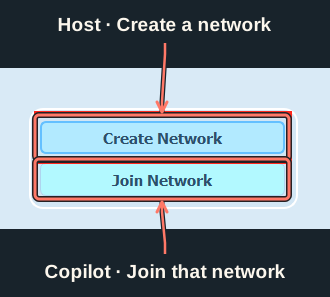
- Host selects Create network, chooses a network name and password, and shares both privately with the copilot.
- Copilot selects Join network and enters the same name and password. Check that you can see each other online. Note the host's IPv4 address shown in Radmin VPN. You will use it in Connect.
If both PCs are already on the same local network, you can connect directly and skip the VPN setup. Radmin setup instructions
2. Set up Connect on both PCs
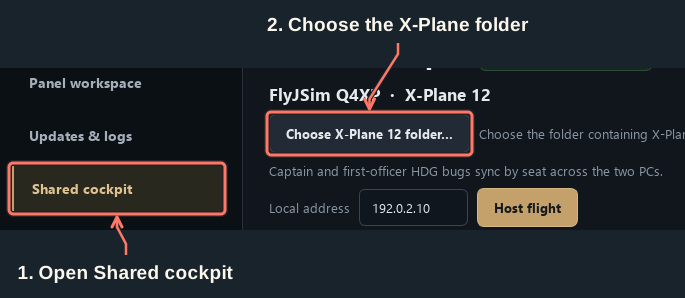
- Install Public Beta 5 on each simulator PC. Open Connect and select Shared cockpit in the sidebar.
- Select Choose X-Plane 12 folder… and pick the main folder containing X-Plane.exe and Resources. Connect installs the shared-flight components there automatically.
- Start or restart X-Plane after the components are installed. Both pilots load the FlyJSim Q4XP and park at the same stand.
3. Create the flight and invite your copilot
On the host PC
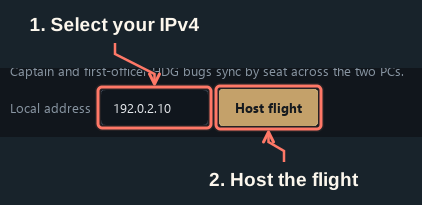
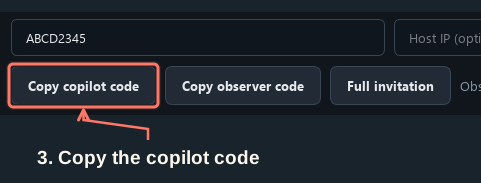
In Shared cockpit, set Local address to the host's VPN IPv4 address, or its LAN address if you are flying locally. Select Host flight, then Copy copilot code. Send the eight-character seat code to your copilot privately. For a remote session, include your VPN IPv4 address.
On the copilot PC
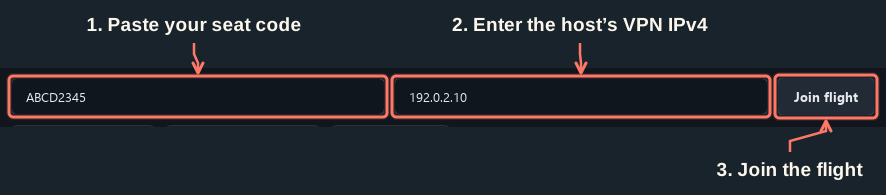
Paste the code into 8-character seat code or full invitation. For a remote flight, enter the host's VPN IPv4 in Host IP. On the same LAN, leave that field empty for automatic discovery. Select Join flight.
Bringing an observer? Use Copy observer code for their separate, read-only seat. They follow the same setup and join steps.
4. Match the cockpits and start flying
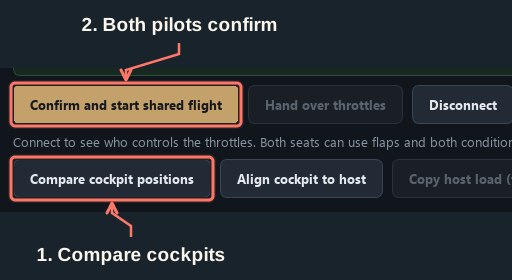
- While parked, select Compare cockpit positions. If needed, align the copilot's cockpit to the host or copy the host's load using the controls in Connect.
- On each PC, manually power up the UNS flight management units you intend to use. Press FPL on each unit to open Flight Plan page 1. Compare the contents across PCs, left with left and right with right.
- Both pilots select Confirm and start shared flight. Once the corresponding UNS is in sync, enter the route. Try changing the captain's selected heading on one PC and watch the captain's heading bug on the other. The first officer has an independent heading bug.
If something doesn’t connect
The copilot can’t find the flight
Check that both PCs show each other online in the same VPN network and that the host selected its VPN address in Connect. Double-check the copilot code and Host IP. The host can also select Full invitation and send the invitation with the address already included. If Connect shows a full invitation instead of a short code, paste it into the same join field.
Connect can’t see the Q4XP
Confirm that Connect has the folder for the copy of X-Plane you are actually running. Restart X-Plane after installing the components and load the Q4XP on the ground on both PCs.
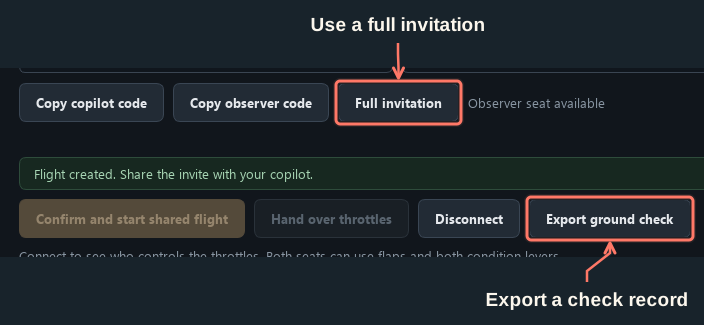
For help with a test flight, use Export ground check on both PCs. Include the time, seat and what each pilot saw when you contact support. To find a copilot or share beta feedback, join the BRASS WORKS Discord.
Known issues
The FMS won’t sync after a cold and dark start
Both pilots must prepare the Q4XP’s UNS flight management units on their own PC. Powering up a unit in one cockpit leaves the corresponding unit in the other cockpit off.
- While parked, each pilot manually powers up each UNS they plan to use and completes its startup prompts.
- On each powered unit, press FPL and leave it on Flight Plan page 1. Compare the page contents with your copilot, captain’s side with captain’s side and first officer’s side with first officer’s side. If a page differs, pause and match it before proceeding.
- Once the pages match, both pilots select Confirm and start shared flight in Connect. Wait for the unit to sync before either pilot enters the route.
The copilot can see the host on the VPN but can’t join
Windows Firewall can allow the VPN connection while still blocking Connect’s incoming requests. Check both PCs, starting with the host.
- On the host PC, check that Local address in Connect is the host’s VPN IPv4 address. The copilot should use that same address in Host IP. For two PCs at home on the same LAN, use the host’s LAN address.
- On each PC, open Windows Security → Firewall & network protection → Allow an app through firewall. Select Change settings and find Brassworks Connect. If it is missing, select Allow another app → Browse and choose the installed BrassworksConnect.exe. To find its folder, right-click the Connect shortcut and open Properties to see its Target.
- For a trusted home LAN or private VPN using the Windows Private profile, check the app and its Private box, then select OK. The rule must match the profile Windows uses for that connection. If your VPN is classified as Public, the Private rule won’t apply. Use a trusted private connection or ask your network administrator for an app rule limited to the copilot’s VPN address. Keep the firewall on.
- Have the host start a new flight and send the new invitation. The copilot can now retry Join flight. If it still fails, check the invitation and export a ground check from each PC.
Microsoft’s guide to allowing an app through Windows Firewall
Windows says the installer is from an unknown publisher
The Public Beta 5 installer has no Windows code-signing signature, so SmartScreen may show Windows protected your PC. If you downloaded the installer using the official BRASS WORKS download and want to install it, select More info → Run anyway. If Windows then asks whether to allow the installer to make changes, check the file name and select Yes.
These steps apply to an unrecognized-app notice. If Windows reports a specific threat, stop and contact support. If a managed PC offers no option to continue, ask its administrator.